|
|
|
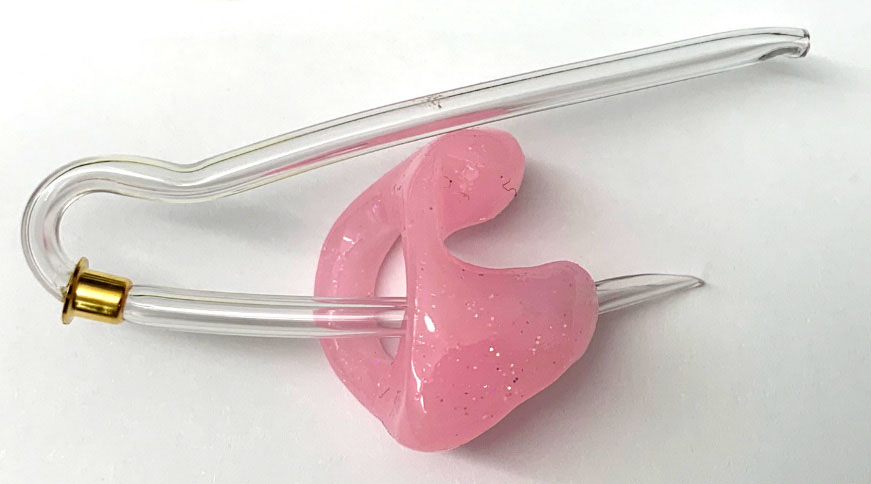
Make sure to remove all parts of the old tubing, and clean off any debris from the mold before re-tubing. Insert new tubing into earmold as shown in the picture below.
If there is a vent, there will be two openings/holes. Put the tubing in the top opening. Do not insert the tube in the bottom vent opening. |
|
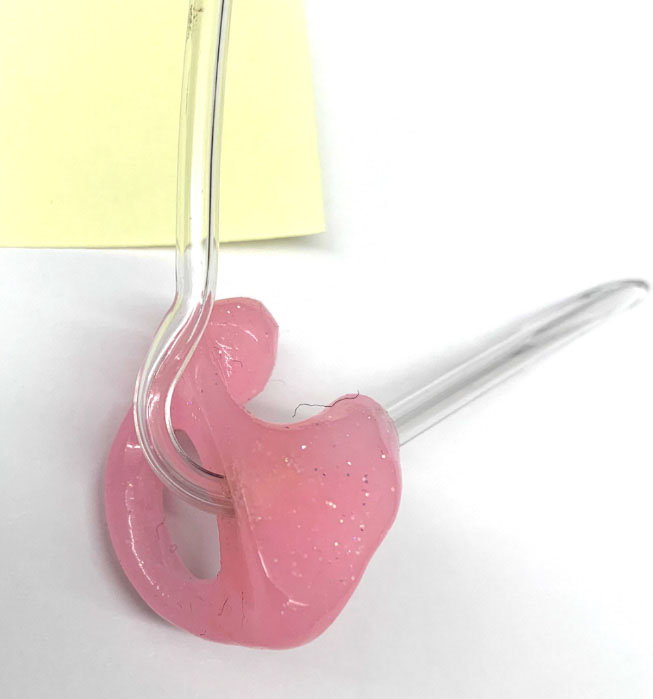
Pull the tubing through as the picture shows. If there is a brass or plastic “lock,” you will feel a small “click.” This is the lock finding its “place” inside the earmold. The other end of the tubing should stick up vertically.
|
|
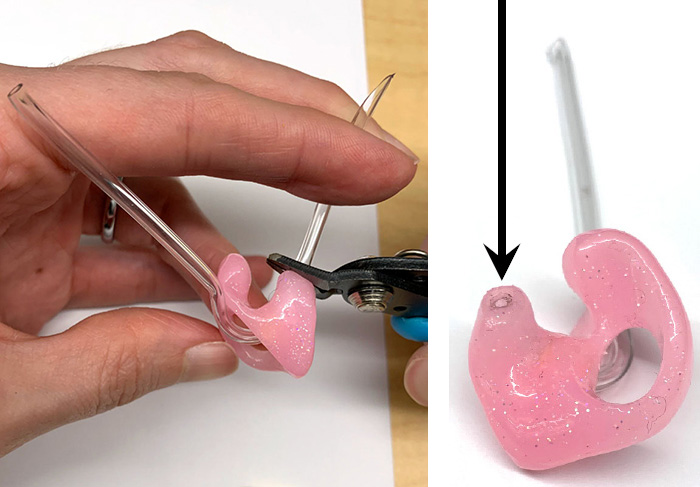
Trim the tubing with scissors as the picture shows. Regular scissors work fine. You want the tubing to be flush with the end of the earmold that will be inserted in the ear canal.
|
|
For these instructions, see our handout “How to Trim Earmold Tubing” seattlechildrens.org/pdf/PE3073.pdf
|
|
To Learn More
Free Interpreter Services

|
 To learn more, view video “How to change earmold tubing”




 Measure and trim the tubing to fit with the hearing aid.
 Also see the video “How to cut earmold tubing”